There are many tutorials on making better grayscale photos utilizing many complex steps, but I always do this simple method first and if lucky, I may not have to correct much further.
Here is the starting color photo followed by the photo after changing it to grayscale in Photoshop.
Image; Mode; Grayscale
Not so great, is it?
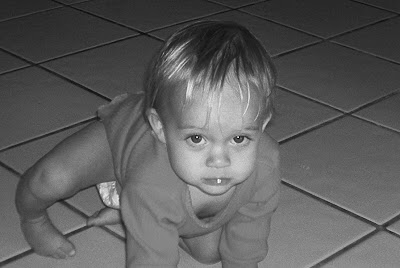
1. A better way is to use lab mode. Open the color original. Bring the Channels Palette to the front.
2. Then go: Image; Mode; Lab.
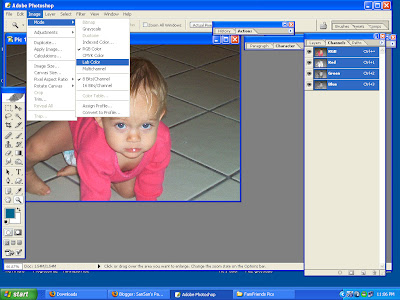
3. Now you'll see Lab, Lightness, A & B channels. Drag A or B to the little trash can below (or right click and choose Delete Channel)
4. Now you see: Alpha 1 and Alpha 2.
5. Delete Alpha 2
6. Important step. Don't forget to go back to MODE and change it back to grayscale at this point. I also applied: Image; Adjustments; Auto Contrast.
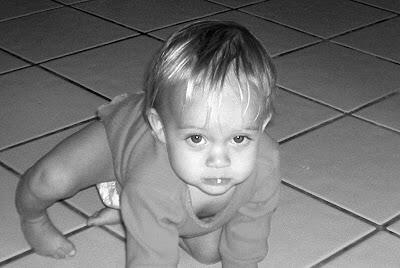
Your photo is greatly improved. You can tweak the levels or the brightness/contrast, or any other methods you are comfortable with. This step gets you closer to a better end result quickly.
7. Most important step: SAVE AS and give it a different name so you won't save over the color original.
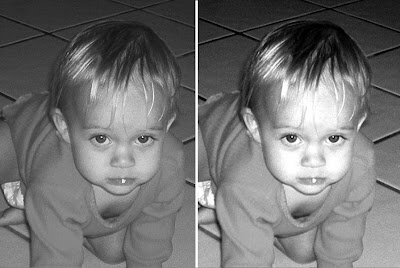
Grayscale only on left; using lab method on the right.
Welcome...
to my paradise! My blog focuses on all things related to digital scrapbooking. Look for an occasional freebie download as well as scrap/photo related tutorials. Comments are always welcome!
Friday, April 24, 2009
Thursday, April 16, 2009
A "VERY COOL" kit from Ziggle Designs
Saturday, April 11, 2009
Easy Peasy
Don't you just love it when something falls together just so easily? I had picked up this gorgeous kit for the Apple Cart challenge at Scrap Orchard. It's by Irene and all her stuff is dreamy gorgeous. I was tired so I grabbed a template in my stash. It is from Pencillines...I gotta say every template I have seen from there is top shelf! Made this in a few minutes time...what was I thinking all that time I refused to entertain templates?!?
Tuesday, April 7, 2009
I love this photo of Nat from a few years ago. She was getting ready to go on for her class Christmas concert and a friend (a boy) gave her this lamb. Love that sweet face!
Kit credits: Paper, Vines and Flowers- Vintage Flowers by Studio Ziska; ; Paper Frame from (Ziska) SBG Impressions of Honor; Gold Alpha (Flergs) Impressions of Heritage
Sunday, April 5, 2009
catching up
It's been a while with just busy life in general and I feared I had lost my scrap mojo. It's not completely back, but I think I am on my way. Spent tonight organizing and cleaning stuff out and decided to play catch up on a couple CTs. I hope to have all them done soon. Computer got an overhaul and cleaning out as well, and it works very fast now, so fast it feels brand new...and I guess it didn't hurt that I got more memory added. So here is the latest page I made...
Kit credits: Forest Friends Collab by Ziggle Designs and Franziska Altmann; Gold frame and grass strip from Firefly Lane Collab by Ziggle Designs and Amanda Heimann; Word art by Createwings Designs
Subscribe to:
Posts (Atom)